Home › Forums › Crafts & Decorations › Easy Fall Ornament Tree by Special Guest Karen Johnson
-
AuthorPosts
-
-
We want to welcome Karen Johnson, a long time Quacker friend of Angels’ as this weeks guest writer for Quacky Creative Ideas.
Easy Fall Ornament Tree
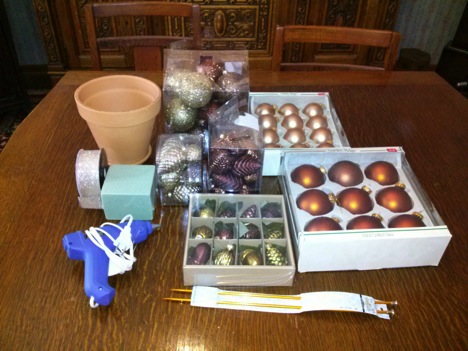
You will need:• 1 * standard size clay pot (6.3”)
• 1.5” glitter ribbon, a glue gun
• floral form (mine was green, almost a cubea, 2-5/8×3-1/2×8-1/2”)
• large sparkle gold and copper ornament balls
• copper matte ornament balls
• sparkle pine cones
• small gold ornament balls
• copper pinecone ornaments
• don’t forget scissors
• 1 * 14” knitting needle.Get Ready…GO!
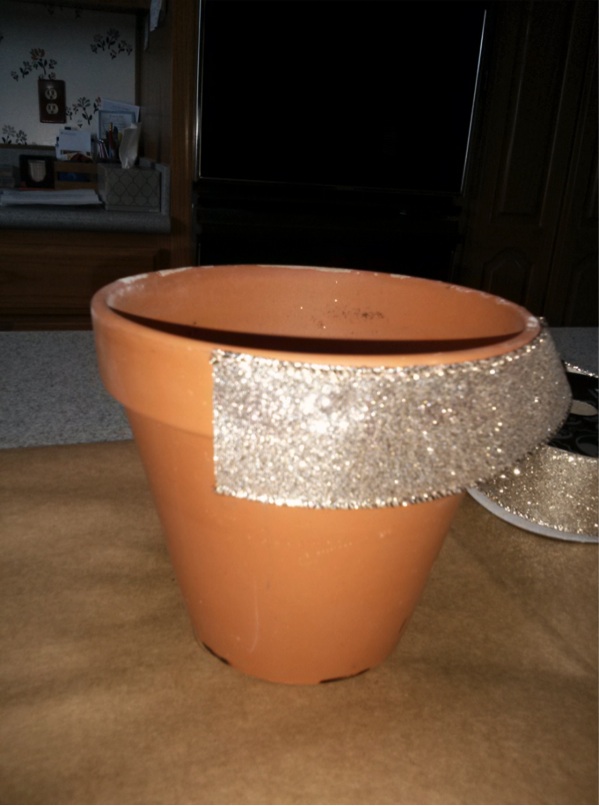
Step 1: Start by gluing the sparkle ribbon around the top of the clay pot. (The illustration is on a smaller pot).
Step 2: Next centering the knitting needle, insert the needle through the bottom center of the floral form and gently place the form in the clay pot.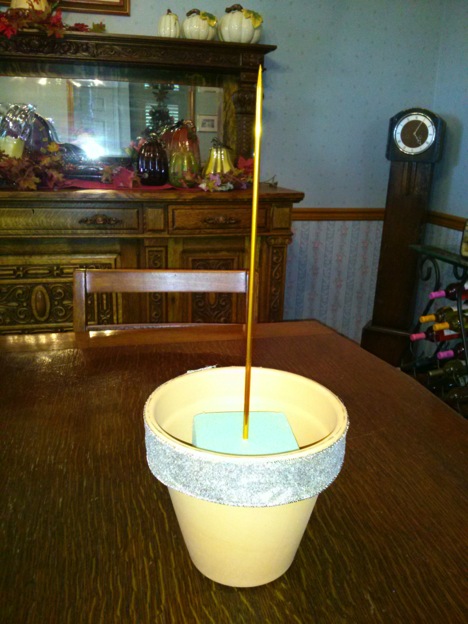
Step 3: Start by running the loops at the tops of the ornaments down the knitting needle, layering the colored balls with the biggest ones first, then the smaller ones as you get to the top of the knitting needle. I added the sparkle pinecones for a different effect. I topped my tree off with one of the pinecones by removing the metal hanger and just placing it over the tip of the knitting needle.The assembly took about 10 minutes to finish and you can add your own touches to any part of the tree.

Step 4: I added little gold pears that I found in my fall decorating box and just inserted them at the base of the ornaments. I put the tree in the middle of some faux greenery and, voila!A quick and easy fall centerpiece for my dining room table!
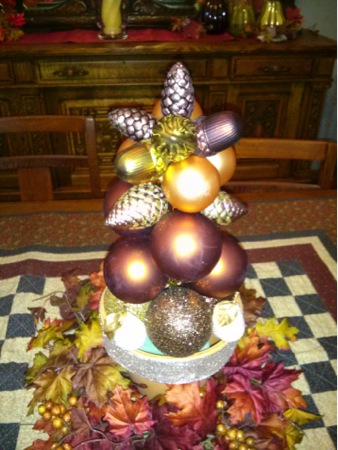
Hope you enjoy making your fall tree and enjoy adding your personal touch to your creation.Happy fall!
Karen JohnsonTo stay up to date at what’s Quackin’ at the Quacker Factory, join the email list! Click here to sign up to receive emails from Quacker Factory – Click Here
To follow Quacker Factory with Angel on Facebook,Click Here
To follow Quacker Factory with Patrick on Facebook, Click Here
-
-
AuthorPosts
- You must be logged in to reply to this topic.

